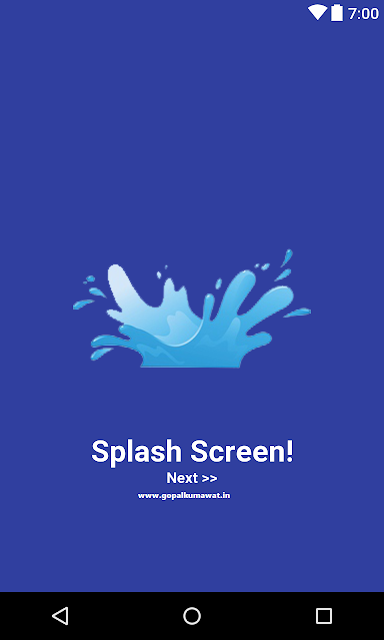
How to Create Spalace Layout :-
Now create a activity and add following code :
1. XML File
<?xml version="1.0" encoding="utf-8"?>
<RelativeLayout xmlns:android="http://schemas.android.com/apk/res/android"
xmlns:app="http://schemas.android.com/apk/res-auto"
xmlns:tools="http://schemas.android.com/tools"
android:layout_width="match_parent"
android:layout_height="match_parent"
tools:context=".SpalaceAct"
android:background="@drawable/side_nav_bar">
<ImageView
android:id="@+id/imageView2"
android:layout_width="match_parent"
android:layout_height="186dp"
android:layout_marginTop="150dp"
app:srcCompat="@mipmap/logo_image" />
<TextView
android:id="@+id/textView2"
android:layout_width="match_parent"
android:layout_height="wrap_content"
android:layout_below="@+id/imageView2"
android:layout_marginTop="146dp"
android:gravity="center"
android:text="from"
android:textColor="#1C721C"
android:textSize="20dp" />
<TextView
android:id="@+id/textView3"
android:layout_width="match_parent"
android:layout_height="wrap_content"
android:layout_below="@+id/textView2"
android:layout_marginTop="20dp"
android:gravity="center"
android:text="FACEBOOK"
android:textColor="#0FDB0F"
android:textSize="25dp" />
<ProgressBar
android:id="@+id/progressBar2"
style="?android:attr/progressBarStyle"
android:layout_width="match_parent"
android:layout_height="wrap_content"
android:layout_below="@+id/imageView2"
android:layout_marginTop="55dp" />
<!-- <ProgressBar
android:layout_below="@+id/imageView2"
android:id="@+id/progressBar2"
style="?android:attr/progressBarStyle"
android:layout_width="match_parent"
android:layout_height="wrap_content" />-->
</RelativeLayout>
2. Java file
package com.example.demodrawernaviga2;
import androidx.appcompat.app.AppCompatActivity;
import android.content.ClipData;
import android.content.Intent;
import android.os.Bundle;
public class SpalaceAct extends AppCompatActivity {
@Override
protected void onCreate(Bundle savedInstanceState) {
super.onCreate(savedInstanceState);
setContentView(R.layout.activity_spalace);
Thread background = new Thread() {
public void run() {
try {
// Thread will sleep for 5 seconds
sleep(1*1000);
// After 5 seconds redirect to another intent
Intent i=new Intent(getBaseContext(),MainActivity.class);
startActivity(i);
//Remove activity
finish();
} catch (Exception e) {
}
}
};
// start thread
background.start();
}
}
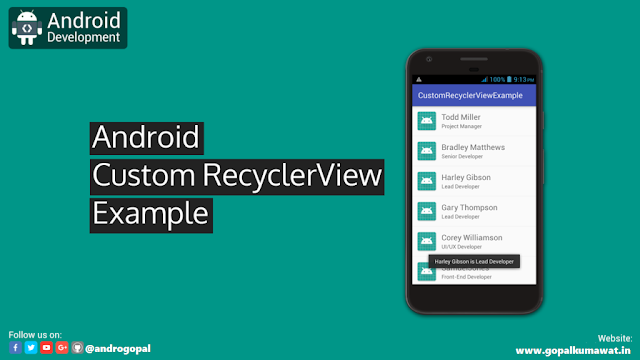
How to Work with Recycler View in android :-
1. Open build.gradle and add recycler view dependency :-implementation 'com.android.support:recyclerview-v7:28.0.0'
Created A activity like MainAcvitiy :-
:- XML File
<?xml version="1.0" encoding="utf-8"?>
<androidx.recyclerview.widget.RecyclerView
xmlns:android="http://schemas.android.com/apk/res/android"
xmlns:tools="http://schemas.android.com/tools"
android:layout_width="match_parent"
android:layout_height="match_parent"
android:scrollbars="vertical"
android:id="@+id/recyclerView">
</androidx.recyclerview.widget.RecyclerView>
:- JAVA File
package com.example.demorecycler;import android.os.Bundle;
import androidx.appcompat.app.AppCompatActivity;
import androidx.recyclerview.widget.LinearLayoutManager;
import androidx.recyclerview.widget.RecyclerView;
public class MainActivity extends AppCompatActivity {
@Override
protected void onCreate(Bundle savedInstanceState) {
super.onCreate(savedInstanceState);
setContentView(R.layout.activity_main);
MyListData[] myListData = new MyListData[] {
new MyListData("Email", android.R.drawable.ic_dialog_email),
new MyListData("Info", android.R.drawable.ic_dialog_info),
new MyListData("Delete", android.R.drawable.ic_delete),
new MyListData("Dialer", android.R.drawable.ic_dialog_dialer),
new MyListData("Alert", android.R.drawable.ic_dialog_alert),
new MyListData("Map", android.R.drawable.ic_dialog_map),
};
RecyclerView recyclerView = (RecyclerView) findViewById(R.id.recyclerView);
MyListAdapter adapter = new MyListAdapter(myListData);
recyclerView.setHasFixedSize(true);
recyclerView.setLayoutManager(new LinearLayoutManager(this));
recyclerView.setAdapter(adapter);
}
}
3. Created A list_item.xml
<?xml version="1.0" encoding="utf-8"?>
<RelativeLayout xmlns:android="http://schemas.android.com/apk/res/android"
android:id="@+id/relativeLayout"
android:layout_width="match_parent"
android:layout_height="?android:attr/listPreferredItemHeightLarge"
android:background="@drawable/border">
<ImageView
android:id="@+id/imageView"
android:layout_width="wrap_content"
android:layout_height="wrap_content"
android:layout_centerVertical="true"
android:layout_alignParentStart="true"
android:layout_alignParentLeft="true"
android:contentDescription="Icon" />
<TextView
android:id="@+id/textView"
android:layout_width="wrap_content"
android:layout_height="match_parent"
android:layout_toEndOf="@id/imageView"
android:layout_toRightOf="@id/imageView"
android:gravity="center_vertical"
android:textSize="16sp"/>
</RelativeLayout>
4. Created A MyListAdapter Java File :-
package com.example.demorecycler;
import android.view.LayoutInflater;
import android.view.View;
import android.view.ViewGroup;
import android.widget.ImageView;
import android.widget.RelativeLayout;
import android.widget.TextView;
import android.widget.Toast;
import androidx.recyclerview.widget.RecyclerView;
public class MyListAdapter extends RecyclerView.Adapter<MyListAdapter.ViewHolder>{
private MyListData[] listdata;
// RecyclerView recyclerView;
public MyListAdapter(MyListData[] listdata) {
this.listdata = listdata;
}
@Override
public ViewHolder onCreateViewHolder(ViewGroup parent, int viewType) {
LayoutInflater layoutInflater = LayoutInflater.from(parent.getContext());
View listItem= layoutInflater.inflate(R.layout.list_item, parent, false);
ViewHolder viewHolder = new ViewHolder(listItem);
return viewHolder;
}
@Override
public void onBindViewHolder(ViewHolder holder, int position) {
final MyListData myListData = listdata[position];
holder.textView.setText(listdata[position].getDescription());
holder.imageView.setImageResource(listdata[position].getImgId());
holder.relativeLayout.setOnClickListener(new View.OnClickListener() {
@Override
public void onClick(View view) {
Toast.makeText(view.getContext(),"click on item: "+myListData.getDescription(),Toast.LENGTH_LONG).show();
}
});
}
@Override
public int getItemCount() {
return listdata.length;
}
public static class ViewHolder extends RecyclerView.ViewHolder {
public ImageView imageView;
public TextView textView;
public RelativeLayout relativeLayout;
public ViewHolder(View itemView) {
super(itemView);
this.imageView = (ImageView) itemView.findViewById(R.id.imageView);
this.textView = (TextView) itemView.findViewById(R.id.textView);
relativeLayout = (RelativeLayout)itemView.findViewById(R.id.relativeLayout);
}
}
}
5. Created A MyListData Java File :-
package com.example.demorecycler;
public class MyListData{
private String description;
private int imgId;
public MyListData(String description, int imgId) {
this.description = description;
this.imgId = imgId;
}
public String getDescription() {
return description;
}
public void setDescription(String description) {
this.description = description;
}
public int getImgId() {
return imgId;
}
public void setImgId(int imgId) {
this.imgId = imgId;
}
}
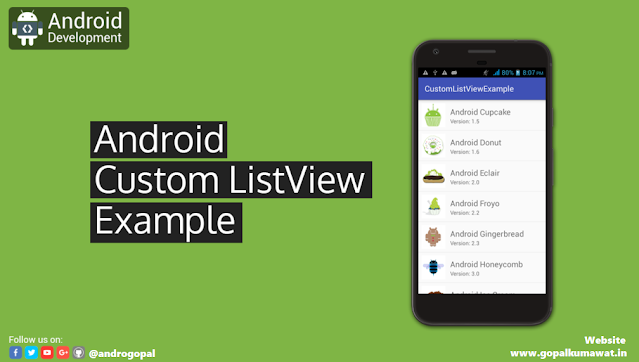
how to create custom listview in android :-
1. Create a Activity MainActivity :-
:- in XML file
<?xml version="1.0" encoding="utf-8"?>
<RelativeLayout xmlns:android="http://schemas.android.com/apk/res/android"
xmlns:app="http://schemas.android.com/apk/res-auto"
xmlns:tools="http://schemas.android.com/tools"
android:layout_width="match_parent"
android:layout_height="match_parent"
tools:context=".MainActivity"
android:background="@drawable/side_nav_bar">
<ListView
android:id="@+id/study_mode_list_item"
android:layout_width="match_parent"
android:layout_height="match_parent"
android:layout_marginLeft="8dp"
android:divider="#8A46A005"
android:dividerHeight="1.5dp"
android:footerDividersEnabled="true"
android:layout_marginRight="8dp"/>
</RelativeLayout>
In JAVA File :-
package com.example.demodrawernaviga2;
import androidx.appcompat.app.AppCompatActivity;
import android.content.Intent;
import android.os.Bundle;
import android.view.View;
import android.widget.AdapterView;
import android.widget.LinearLayout;
import android.widget.ListView;
import android.widget.Toast;
import com.example.demodrawernaviga2.R;
public class CategoryStudy extends AppCompatActivity {
int book[] = {R.drawable.stude_mode, R.drawable.stude_mode, R.drawable.stude_mode,
R.drawable.stude_mode, R.drawable.stude_mode, R.drawable.stude_mode, R.drawable.stude_mode, R.drawable.stude_mode, R.drawable.stude_mode,
R.drawable.stude_mode, R.drawable.stude_mode, R.drawable.stude_mode,
R.drawable.stude_mode};
String subject[] = {"Hindi","English","Science","Maths","Biology","Physics","Chemistry","Geography","Citizenship",
"Business Studies","Psychology","Sociology","Economics"};
int next[] = {R.drawable.next, R.drawable.next, R.drawable.next, R.drawable.next, R.drawable.next, R.drawable.next,
R.drawable.next, R.drawable.next, R.drawable.next, R.drawable.next, R.drawable.next, R.drawable.next,
R.drawable.next};
@Override
protected void onCreate(Bundle savedInstanceState) {
super.onCreate(savedInstanceState);
setContentView(R.layout.activity_category_study);
ListView listView = (ListView)findViewById(R.id.study_mode_list_item);
CustomAdapterStudyMode customAdapter = new CustomAdapterStudyMode(getApplicationContext(),book,subject,next);
listView.setAdapter(customAdapter);
listView.setOnItemClickListener(new AdapterView.OnItemClickListener() {
@Override
public void onItemClick(AdapterView<?> adapterView, View view, int i, long l) {
switch (i){
case 1:
Intent in1=new Intent(getApplicationContext(),GameCate.class);
startActivity(in1);
break;
case 2:
Intent in2=new Intent(getApplicationContext(),MainActivity.class);
startActivity(in2);
break;
case 3:
Intent in3=new Intent(getApplicationContext(),SpalaceAct.class);
startActivity(in3);
break;
case 4:
Intent in4=new Intent(getApplicationContext(),QuizCate.class);
startActivity(in4);
break;
}
//show the selected image in toast according to position
}
});
}
}
2. Create a activity_list.xml File
<?xml version="1.0" encoding="utf-8"?>
<LinearLayout xmlns:android="http://schemas.android.com/apk/res/android"
android:orientation="vertical"
android:layout_width="match_parent"
android:layout_height="match_parent"
android:background="@drawable/side_multi_color_list">
<LinearLayout
android:layout_width="match_parent"
android:layout_height="wrap_content"
android:orientation="horizontal"
android:layout_marginTop="15dp"
android:layout_marginBottom="15dp"
android:weightSum="100">
<ImageView
android:id="@+id/study_mode"
android:layout_width="40dp"
android:layout_height="40dp"
android:src="@drawable/stude_mode"
android:layout_weight="20"
android:elevation="5dp"/>
<TextView
android:id="@+id/study_mode_text"
android:layout_width="wrap_content"
android:layout_height="wrap_content"
android:text="Hindi"
android:textStyle="italic|bold"
android:fontFamily="serif-monospace"
android:textSize="20dp"
android:layout_weight="70"
android:layout_marginTop="10dp"
android:textColor="#ffffff"/>
<ImageView
android:id="@+id/study_mode_next"
android:layout_width="20dp"
android:layout_height="25dp"
android:src="@drawable/next"
android:layout_weight="10"
android:layout_marginTop="7dp"
android:elevation="5dp"/>
</LinearLayout>
</LinearLayout>
3. Now Create a CustomAdapter JAVA Class :-
package com.example.demodrawernaviga2;
import android.content.Context;
import android.view.LayoutInflater;
import android.view.View;
import android.view.ViewGroup;
import android.widget.BaseAdapter;
import android.widget.ImageView;
import android.widget.TextView;
public class CustomAdapterStudyMode extends BaseAdapter {
Context context;
int book[];
String subject[];
int next[];
LayoutInflater inflter;
public CustomAdapterStudyMode(Context applicationContext, int[] book, String[] subject, int[] next) {
this.context = context;
this.book = book;
this.subject = subject;
this.next = next;
inflter = (LayoutInflater.from(applicationContext));
}
@Override
public int getCount() {
return subject.length;
}
@Override
public Object getItem(int i) {
return null;
}
@Override
public long getItemId(int i) {
return 0;
}
@Override
public View getView(int i, View view, ViewGroup viewGroup) {
view = inflter.inflate(R.layout.activity_study_list, null);
ImageView icon = (ImageView) view.findViewById(R.id.study_mode);
TextView tv = (TextView) view.findViewById(R.id.study_mode_text);
ImageView icon1 = (ImageView) view.findViewById(R.id.study_mode_next);
icon.setImageResource(book[i]);
tv.setText(subject[i]);
icon1.setImageResource(next[i]);
return view;
}
}


